Scouting Fields
Trimble Ag Software makes it simple to create and share field scout reports, with tools that put your people in the right place, the first time. Use Trimble Ag Mobile to navigate to precise coordinates in the field using your mobile device’s built-in GPS, and add benchmarks to field maps. Tap and click to add photos, notes on crop health, property issues, product recommendations, and save or email reports to advisors. The mobile app even works when you’re outside cell or wi-fi range, so that you can sync updates with the online account to view and edit later.
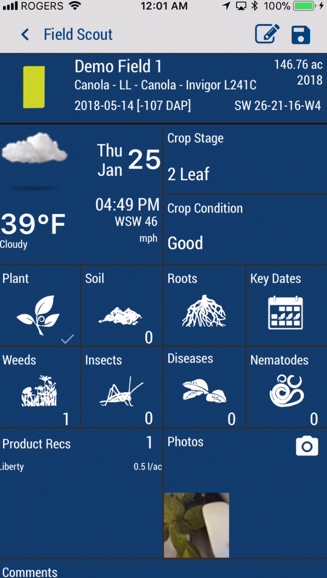
Create a new field scout report with Trimble Ag Mobile to quickly record observations on your mobile device when you’re out in the field. Select from predefined crop health factors, add photos and comments, then sync updates with your online account once you’re back within cell or wi-fi range. Save your report anytime to edit later, keep on file or share with contacts, operators or partners with access to your account, or email reports to other advisors.
- Log in to the mobile app with the same Trimble ID used to access your online account (learn more)
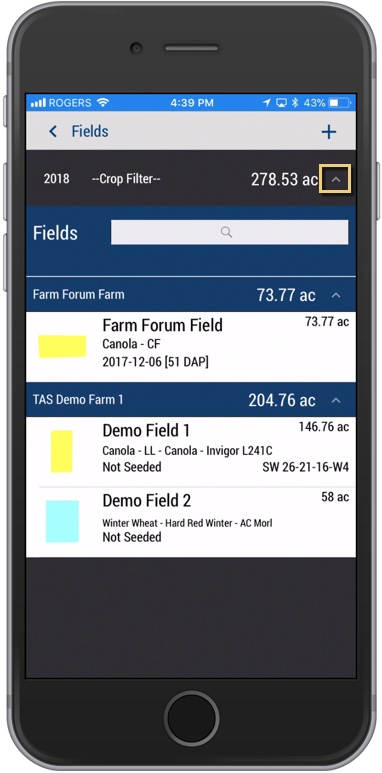
- From the mobile app’s home screen, select the preferred crop year (top left)
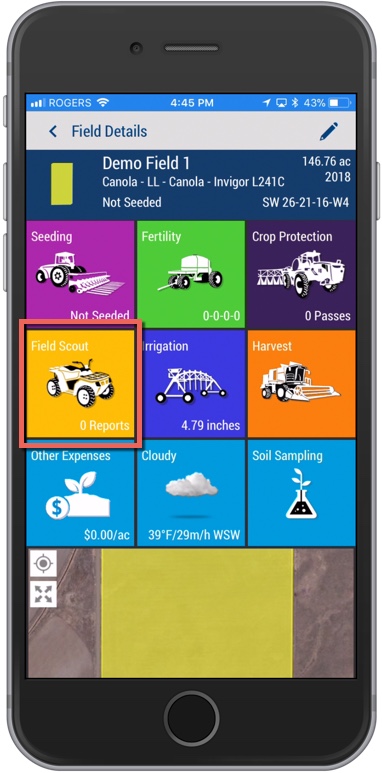
- Tap the Fields tile
- Tap the arrow on the black row to expand the farms list, then scroll and tap to select a field
- On the Field Details screen, tap the Field Scout tile
- On the Field Scout summary screen, tap the plus
 icon to add a scouting record
- On the Field Scout detail screen, tap to select or enter observations, as needed
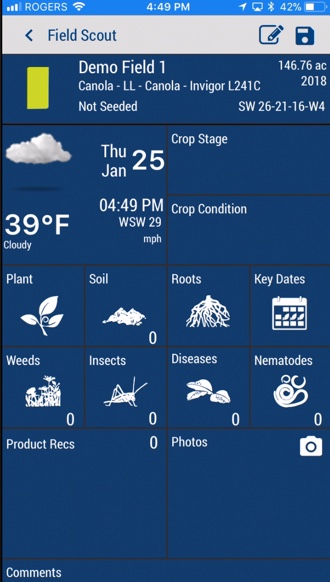
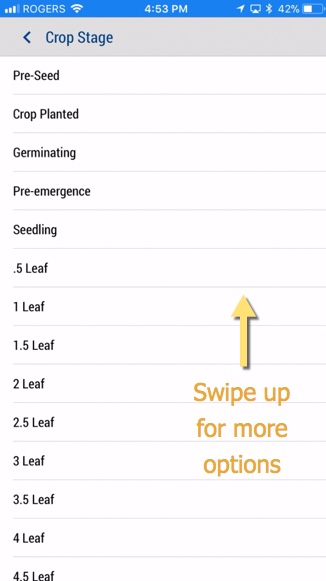
- Crop Stage (required) – tap to select from the list (swipe up for more options)
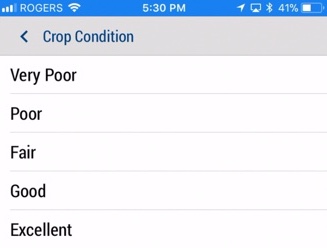
- Crop Condition (required) – tap to select a rating from the list
- Plant – tap to view the Plant Observations screen and enter text or tap to select options; when finished, tap Done (or Dismiss)

- Soil – tap to view any Soil sample reports saved for this scouting report, or tap the plusicon to add soil sample reports

- On the Soil sample report screen, tap to enter text or select options (note: no entries are required to save the default report as shown below)
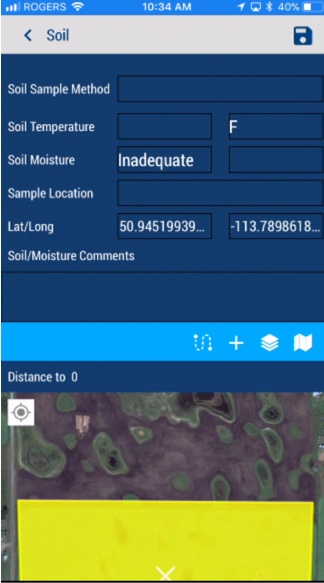
- Soil Sample Method – tap to enter text
- Soil Temperature – tap to enter a number, then tap the unit of measure to select Fahrenheit or Celsius
- Soil Moisture – tap to change from the default (Inadequate) and select from the list (Adequate or Excessive)
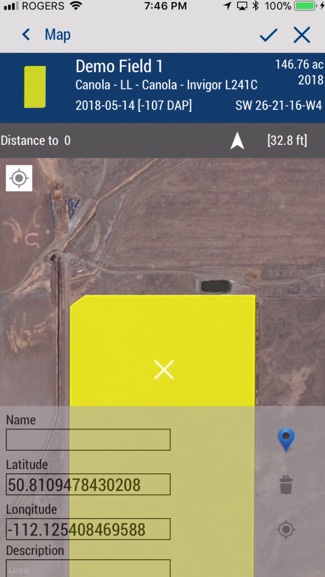
- Sample Location – tap to enter text
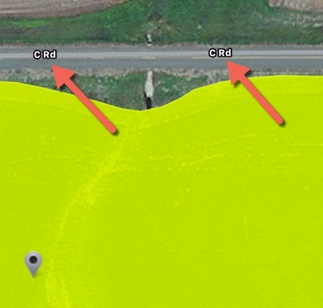
- Lat/Long – touch the screen to slide the map under the white X to automatically update latitude and longitude coordinates, or tap to enter text
- Soil/Moisture Comments – tap to enter text
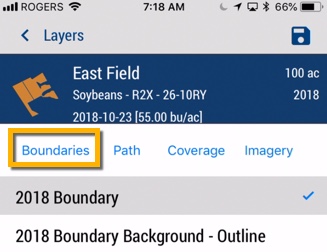
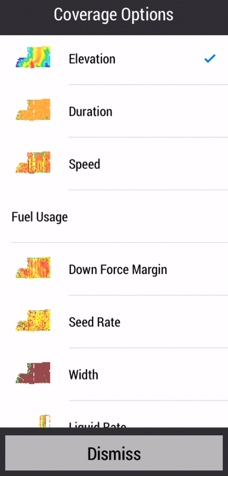
- Swipe up to view the field map and tap an icon to add, edit or view the following map features:
- Click the disc
 icon to save the Soil sample report
- View the list of Soil sample reports for this field scout report, with the following options (or click the < back arrow to return to the Field Details screen):

- add a new report
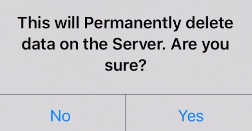
 delete one more reports (select by tapping the checkbox first)
- Roots – tap to view the Root Observations screen and enter text or tap to select options; when finished, tap Done (or Dismiss)

- Key Dates – (skip) will auto-populate or remain blank if not applicable, as key dates are not available for all crops
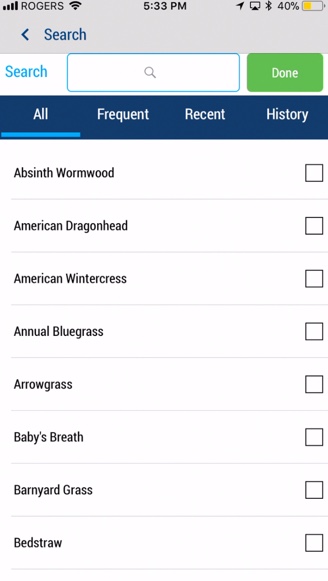
- Weeds – tap to view the master list to search or select from All, Frequent, Recent or History items (swipe up for more options), then tap a checkbox to select an item and click Done
- View the list of Associated Weeds for this field scout report, with the following options (or click the < back arrow to return to the Field Details screen):
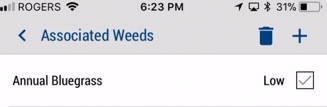
- Tap the checkbox to select an optional Low rating
- delete one more weeds (select by tapping the checkbox first)
- add a new weed
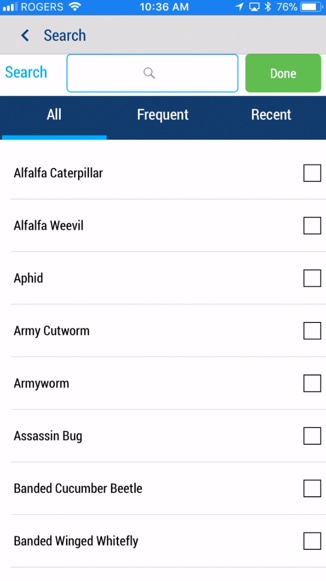
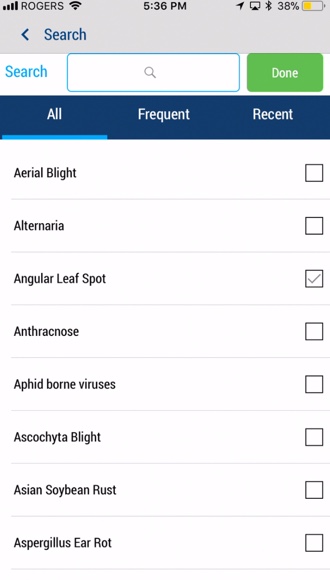
- Insects – tap to view the master list to search or select from All, Frequent or Recent items (swipe up for more options), then tap a checkbox to select an item and click Done
- View the list of Associated Insects for this field scout report, with the following options (or click the < back arrow to return to the Field Details screen):
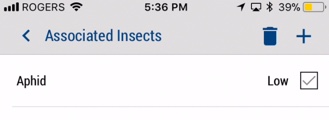
- Tap the checkbox to select an optional Low rating
- delete one more insects (select by tapping the checkbox first)
- add a new insect
- Diseases – tap to view the master list to search or select from All, Frequent or Recent items (swipe up for more options), then tap a checkbox to select an item and click Done
- View the list of Associated Diseases for this field scout report, with the following options (or click the < back arrow to return to the Field Details screen):
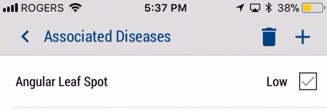
- Tap the checkbox to select an optional Low rating
- delete one more diseases (select by tapping the checkbox first)
- add a new disease
- Nematodes – (skip) not available for all regions; contact our customer support team to have this added to your account
- Product Recs – tap to view the Product App Recommendation screen (learn more)
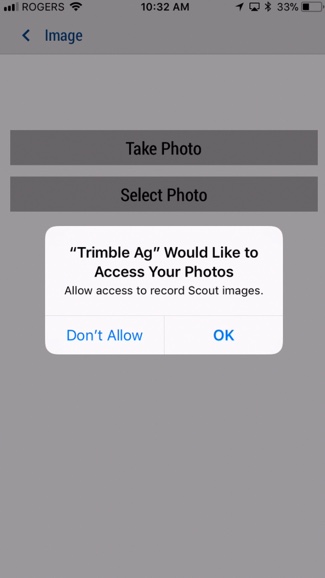
- Photos – tap the camera
 icon to launch your mobile device’s camera
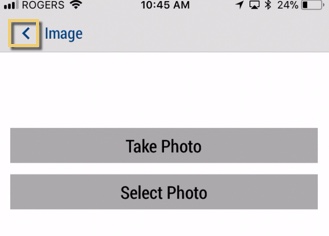
- Tap OK (or Don’t Allow) to allow Trimble Ag Mobile to access your photos to record field scouting images
- Tap to select one of two photo options:
- Take Photo – launches your device’s camera so that you can take a new photo (displays all shots as portrait/vertical)
- Preview the new photo and tap Retake or Use Photo (note: when selecting Use Photo, the camera launches again; tap Cancel to close the camera)

- Tap the back arrow on the Image screen to return to the Field Scout detail screen
- View the image saved to the Field Scout report under Photos
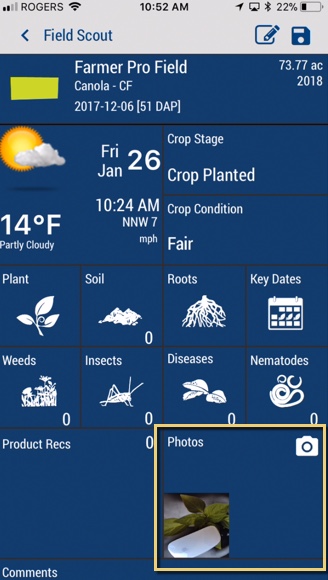
- Tap to open the close-up Image View or delete the image (tap the back arrow to return to the previous screen)

- Select a Photo – launches your device’s photo library
- Tap one or more photos on the Image selection screen, then tap the disc icon to save selection

- Tap the back arrow on the Image screen to return to the Field Scout detail screen
- View thumbnail images saved to the Field Scout report under Photos
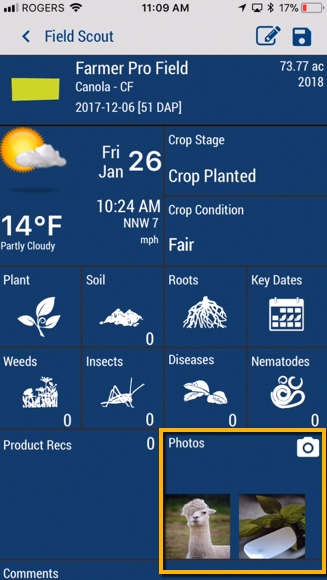
- Tap to open the close-up Image View or delete the image (tap the back arrow to return to the previous screen)
- Comments – tap to enter optional text
- Swipe up to display the field boundary map at the bottom of the screen
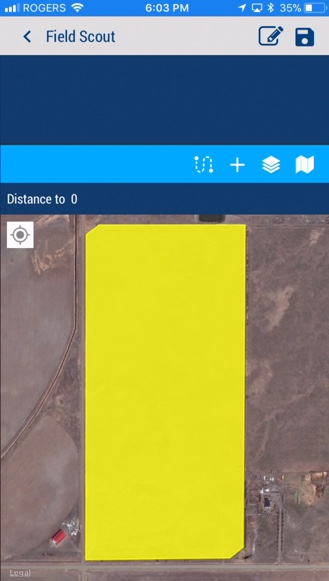
- Tap an icon to add, edit or view the following map features:
- Click the disc to save changes
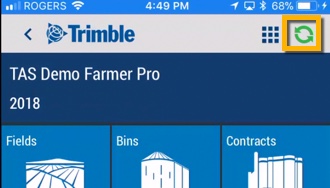
- Sync changes with the online account when you’re within cellular or wi-fi range, by returning to the home screen and tapping the green sync icon
 (top right)
After you’ve saved a Trimble Ag Software field scout report on the mobile app or online, you can share reports by email from your mobile device. Recipients can view report details and photos, even without access to your account. For best results, always sync any mobile changes with the online account (return to the home screen and tap the sync button  on the top right) before hitting send.
- Log in to the mobile app with the same Trimble ID used to access your online account (learn more)
- From the mobile app’s home screen, select the preferred crop year (top left)
- Tap the Fields tile
- Tap the arrow on the black row to expand the farms list, then scroll and tap to select a field
- On the Field Details screen, tap the Field Scout tile
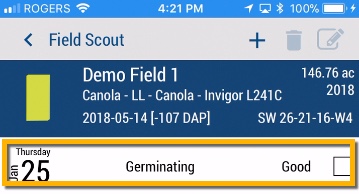
- On the Field Scout summary screen, choose one of two options:
- Preview and Send – Tap a record to view the report details (optional), then tap the pencil
 icon
icon
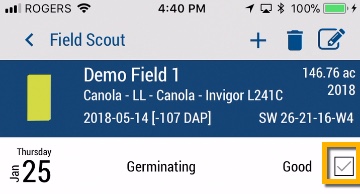
- Send – tap to add a checkmark to select a record, then tap the pencil icon, which is now visible
- Your mobile device’s default email app will launch (check your device Mail settings)
- Add more information to the message such as directions to field and benchmark coordinates (optional), being careful not to change the link to the report

- Click Send (or Cancel)
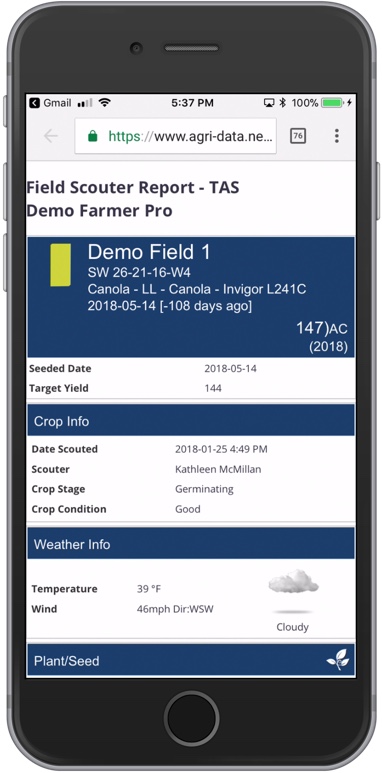
- The recipient can click on the link in the message to view the field scout report with photos (excludes map and map coordinates) that launches in their mobile device’s web browser
More options:
- You can also email field scout reports from the Reports tile on the mobile app home screen

- Tap to select Field Scouting Reports
- Filter the reports (optional) by tapping the Start Date and End Date to select a date range
- Continue from step 6 above
Plan the next step in your crop management plan with product recommendations on Trimble Ag Mobile. As part of the field scout report, you or your advisors with access to your account can use the mobile app to define and share the purpose, timing, rate and more for product applications, including automatic PHI (pre-harvest interval) and REI (re-entry interval) alerts to manage the health and safety of your operators and customers.
- Log in to the mobile app with the same Trimble ID used to access your online account (learn more)
- From the mobile app’s home screen, select the preferred crop year (top left)
- Tap the Fields tile
- Tap the arrow on the black row to expand the farms list, then scroll and tap to select a field
- On the Field Details screen, tap the Field Scout tile
- On the Field Scout summary screen, tap a record to view the report (or tap the plus icon to add a new report)
- On the Field Scout detail screen, tap to select Product Recs
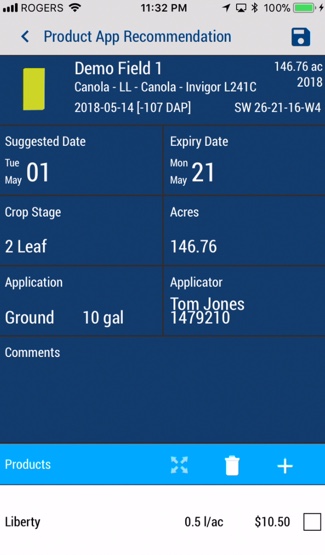
- On the Product App Recommendation screen, tap to enter or select from the options shown
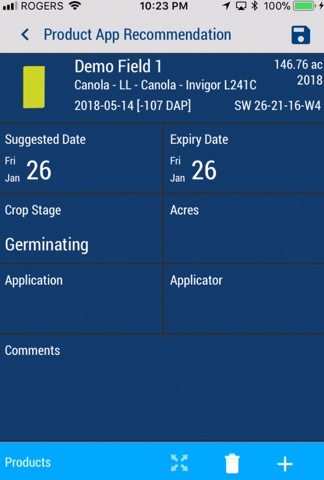
- Suggested Date – tap to select a start date for optimal window of application
- Expiry Date – tap to select the date that product must be applied on or before
- Crop Stage – tap to select from the master list (note: any changes here will be reflected on the Field Scout report; if planning a product recommendation months in the future, consider starting from a new, future-dated Field Scout report to align crop stages on both reports)
- Acres – tap to enter a number of acres for the application (may display hectares, depending on your settings)
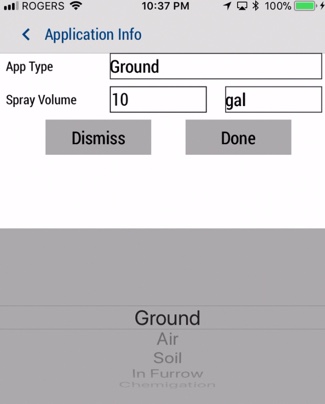
- Application – tap to select App Type type from the list, then enter a Spray Volume and tap to select the unit of measure from the list; click Done (or Dismiss)
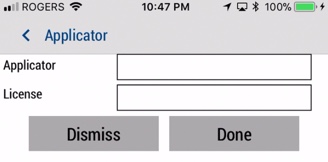
- Applicator – tap to enter the Applicator name and License number, then tap Done (or Dismiss)
- Comments – tap to enter text notes (optional)
- Products – tap to select from options
 Tank Mix – display and tap to select an item (if available in your account)
- Delete – tap the checkbox to remove one or more Products from the recommendation
- Pesticide Application Search – tap to search or select from All, Recent, My Materials or Purchased products
- On the Pesticide Application detail screen, enter or select the options
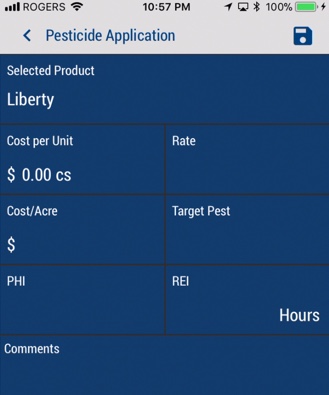
- Selected Product – keep (or tap to select a different product from the list)
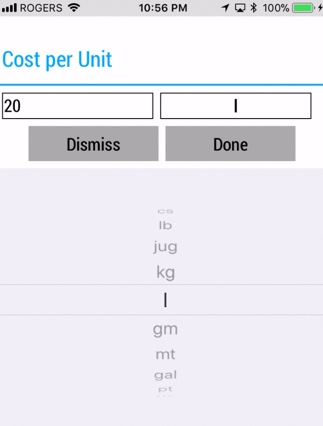
- Cost per Unit – tap to enter the cost and select the unit of measure, then tap Done (or Dismiss)
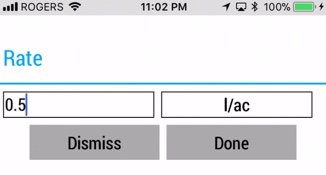
- Rate – tap enter the application volume and select the unit of measure, then tap Done (or Dismiss)
- Target Pest – tap to enter text (for example: Weeds), then tap Done (or Dismiss)
- PHI – displays a pre-harvest interval for some products, to automatically alert mobile app users on your account of fields that can no longer be treated due to upcoming harvest; if nothing is displayed, enter text as required from the manufacturer’s label
- REI – displays a re-entry interval for some products, to automatically alert mobile app users on your account of fields that are temporarily unsafe to enter without protective clothing or equipment; if nothing is displayed, enter text as required from the manufacturer’s label
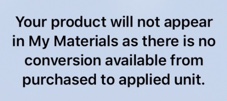
- Tap the disc icon to save changes, which may display the following notice (applicable if units of measure used in this application do not match those in the purchased inventory on your account)
- View or edit the completed Product App Recommendation
- Tap the disc icon to save changes and return to the Field Scout detail view
- Tap the disc icon again to update the Field Scout with the new Product Recommendations
- Sync changes with the online account when you’re within cellular or wi-fi range, by returning to the home screen and tapping the green sync icon (top right)
More options:
- Email – tap the pencil icon on the Field Scout report to email the Field Scout report including Product Recommendations
- Delete – tap Product Recs on the Field Scout report to manually clear entries and delete Products from the Product App Recommendation screen, then tap the disc icon to save changes
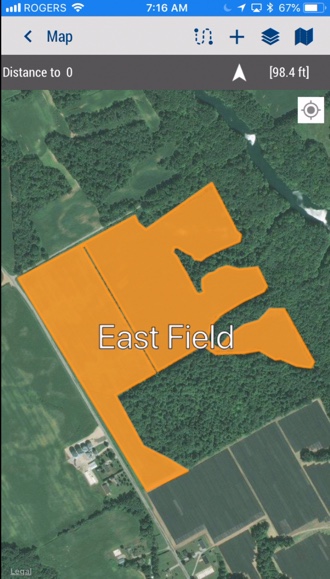
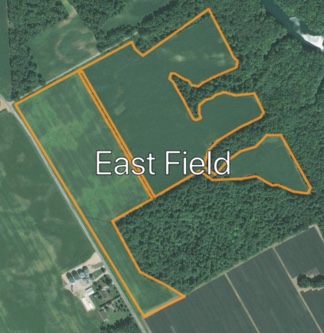
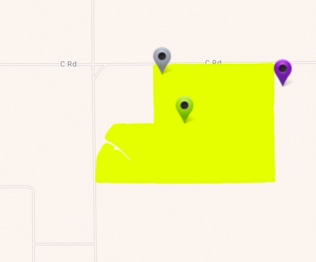
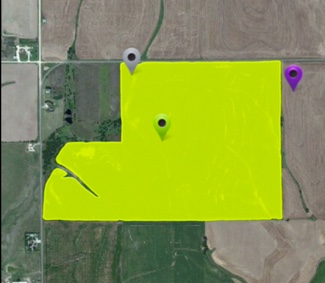
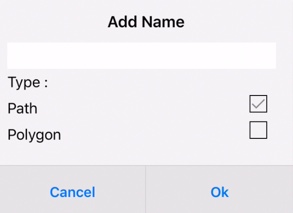
Use Trimble Ag Mobile to easily drop map points to create a path or polygon with a custom name to keep track of field scouting, crop health, property issues and more. With precise coordinates automatically generated for each shape, you can use your mobile device’s built-in GPS to view the distance to navigate to the shape from your current location. Use these map features on any field on the mobile app, starting from the home screen’s Field tile or Farm tile.
- Log in to the mobile app with the same Trimble ID used to access your online account (learn more)
- From the mobile app’s home screen, select the preferred crop year (top left)
- Tap the Fields tile
- Tap the full-screen icon to expand the map view
- Tap the compass
 icon to show your current location (only use if you’re close to the field boundary)
- Tap the path or polygon
 icon
icon
- Enter text to Add Name, tap to check the Type (path or polygon) and tap OK (or Cancel)
- Touch the screen to slide the map under the white X to position the first point, then tap the check mark
 to save the point (or X to cancel)
- Tap the + icon to add another point
- Tap the check mark to save the point (or X to cancel); repeat as needed
- Tap the path or polygon icon to save the shape and update distance from your current location
- Tap the shape to view the name
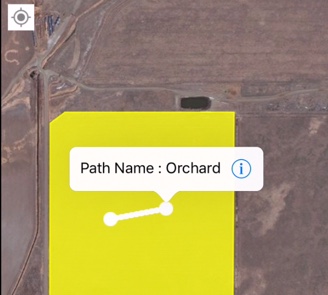
- Tap the information
 icon to select (or Cancel) from a range of options to edit or delete the path, type, name, colour or point
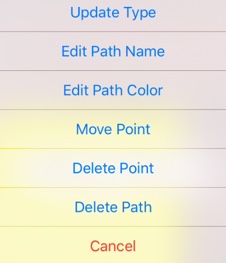
- Tap OK (or Cancel)
- Return to the home screen and tap the sync button (top right) to sync changes to/from your online account
- Tip: the sync button will be green when updates are available